How To Smoke Cheese In Electric Smoker
Smoking cheese is a delightful culinary endeavor that allows you to infuse your favorite varieties with rich, smoky flavors. Whether you're an experienced pitmaster or a novice cook, smoking cheese in an electric smoker is straightforward and rewarding. This comprehensive guide will walk you through the steps to achieve perfectly smoked cheese that will elevate your charcuterie boards and appetizers.
Why Smoke Cheese?
Smoking cheese is a fantastic way to add depth and complexity to its flavor profile. The gentle infusion of smoky notes complements the cheese's creamy, savory nature, creating a mouthwatering combination that appeals to cheese lovers and food enthusiasts alike. Additionally, smoked cheese can be a versatile ingredient for various dishes, from grilled sandwiches to gourmet mac 'n' cheese.
Equipment and Ingredients
Equipment:
- Electric smoker
- Cheese of your choice (hard cheeses like cheddar, gouda, or provolone work well)
- Wood chips or pellets (milder woods like apple, cherry, or alder are recommended)
- Cold smoking attachment (if your electric smoker doesn't support cold smoking)
- Cheese grates or mesh trays
- Heat-resistant gloves
- Aluminum foil
- Timer
Ingredients:
Cheese, as much as you'd like to smoke
Step-by-Step Guide to Smoking Cheese
Step 1: Preparing the Cheese
Start by choosing high-quality cheese. Hard cheeses with lower moisture content work best for smoking, as they absorb smoke flavors more effectively. Cheddar, gouda, provolone, and Swiss are popular choices.
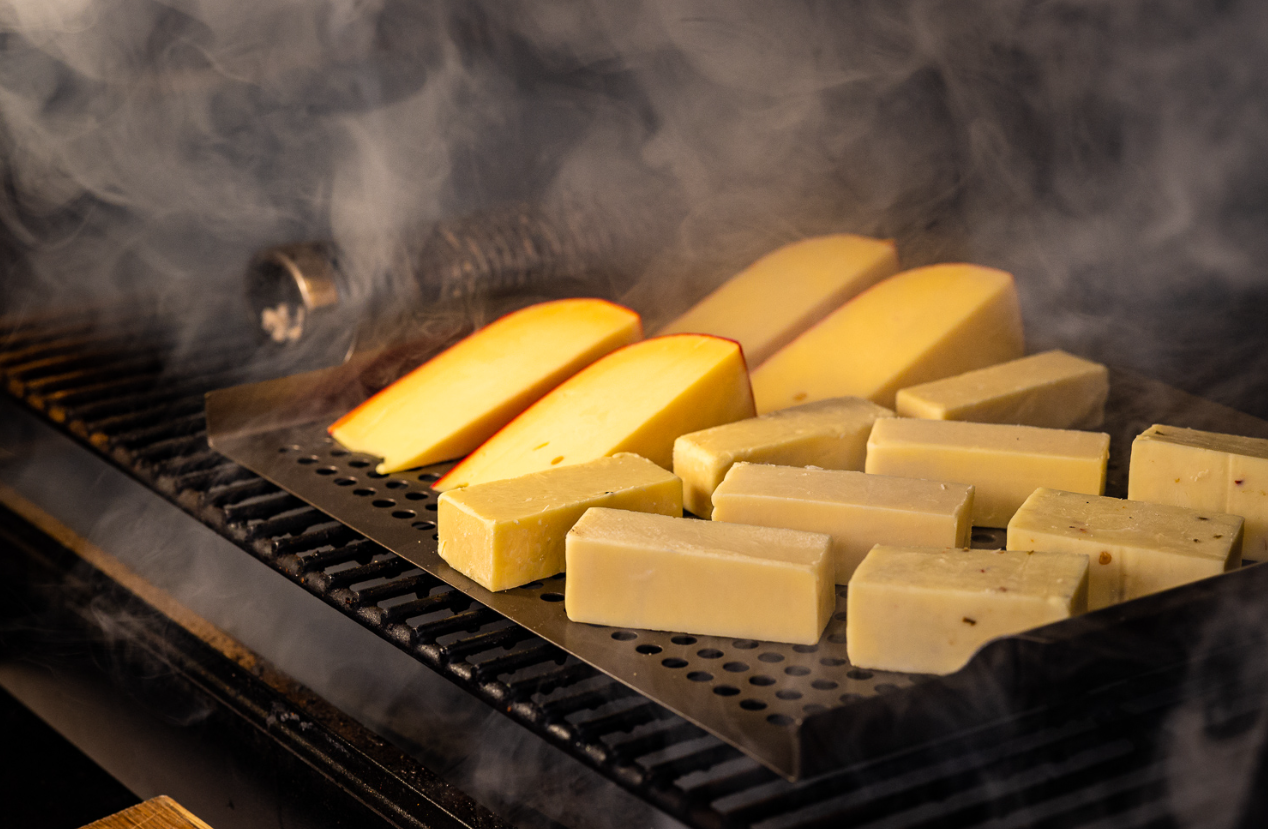
Cut the cheese into smaller pieces or blocks. Smaller pieces absorb smoke more evenly, so you can cut your cheese into chunks, sticks, or smaller blocks, depending on your preference.
Place the cheese pieces on a baking sheet and let them sit at room temperature for about 30 minutes to an hour. This allows the cheese to form a tacky surface, which helps the smoke adhere to it during the smoking process.
Step 2: Preparing the Electric Smoker
Set up your electric smoker according to the manufacturer's instructions. Ensure it's clean and free from any residue from previous smoking sessions.
If your electric smoker doesn't support cold smoking (maintaining temperatures below 90°F or 32°C), use a rigid smoking attachment or an external smoke generator. This ensures that the cheese won't melt during the smoking process.
Also Read: How Does an Electric Smoker Work?
Step 3: Preparing the Smoke
Fill the smoker's wood chip or pellet tray with your chosen wood chips or pellets. For cheese smoking, it's recommended to use milder woods like apple, cherry, or alder, as they impart a gentle smoky flavor without overwhelming the cheese.
If using an external smoke generator, follow the manufacturer's instructions to fill and ignite it.
Step 4: Smoking the Cheese
Place the cheese pieces on cheese grates or mesh trays inside the smoker. Ensure there's space between each piece to allow for even smoke penetration.
If your electric smoker supports cold smoking, set it to maintain a temperature between 50-90°F (10-32°C). If not, you must use an external rigid smoking attachment to achieve these temperatures.
Start the smoking process. The goal is to expose the cheese to the smoke for about 2-4 hours, depending on your desired smokiness level. Longer smoking times result in a more robust smoky flavor so that you can adjust to your taste.
Keep the smoker's vent partially open to ensure a steady flow of smoke.
Step 5: Monitoring the Smoking Process
During the smoking process, monitoring the cheese's temperature is essential. Use a digital thermometer to keep track. If the cheese's internal temperature approaches 90°F (32°C) or begins to soften, it's getting too warm and may melt. In this case, stop smoking and allow the cheese to cool before continuing.
Smoke the cheese in multiple short sessions, rather than one continuous session, to achieve the desired level of smokiness while preventing overheating.
Step 6: Resting and Storing the Smoked Cheese
Once you've achieved your desired level of smokiness, carefully remove the cheese from the smoker using heat-resistant gloves.
Allow the smoked cheese to rest at room temperature for about an hour. This helps the flavors meld and settle.
After resting, wrap the smoked cheese tightly in plastic or vacuum-sealed bags. Store it in the refrigerator for at least one week to allow the smoky flavors to develop fully.
Smoked cheese can be stored in the refrigerator for several months. The longer it rests, the more pronounced the smoky flavor will become.
Step 7: Enjoying Your Smoked Cheese
Once your smoked cheese has rested and developed its smoky character, it's ready to be enjoyed. Slice, cube, or shred the smoked cheese to use in your favorite dishes or create a delightful charcuterie board.
Smoked cheese pairs wonderfully with crackers, bread, fruits, nuts, and various accompaniments. Get creative with your combinations to savor the full range of flavors.
Conclusion
In conclusion, smoking cheese in an electric smoker is a rewarding culinary adventure that allows you to transform ordinary cheese into a flavor-packed delight. Following these steps, you can achieve perfectly smoked cheese with a delicate, smoky aroma and a rich, savory taste. Whether serving it as an appetizer, adding it to sandwiches, or using it in your favorite recipes, smoked cheese will elevate your culinary creations and delight your taste buds. So fire up your electric smoker and start enjoying the delicious world of smoked cheese.


